Quantcast
Channel: Lithops Stories
Viewing all 335 articles
Browse latest View live

Adromischus marianiae: Part 1 (12 pics)

$
0
0
These days I have been feeding my three (relatively) new succulent passions. The first one is Anacampseros that was reported on in the last post. The second is Avonia, of which I've recently bought many new plants and will report soon. 

The third passion is Adromischus. Although I have several larger species like A. maculatus, cooperi, or cristatus, they neither grow well under my conditions nor are very pretty in general. It's not a surprise that I belong to the majority of people who are into those cute small Adromischus with round heavily textured leaves known as A. marianiae, most of them of the "herrei" variety. Unfortunately those are still very expensive, even the more widespread varieties. It is rarely possible to buy one for less than 20 Euros while some cultivars go for thousands on Ebay. Nevertheless, I'm trying to build some sort of a collection with as many different shapes represented as possible. From what research I've done so far it seems you should not be relying on names much. There are so many hybrids out there! And so many of them look really similar. You just go by their looks and try to get whatever you do not have already represented among your plants. Although I also wouldn't mind getting the same type of plant from different sources in a hope to have genetically different plants and not just clones of the same one. Maybe it would be possible to have them produce seeds this way. Of course you can always try getting hybrid seeds by crossing different types but I'd like to have a possibility to produce seeds with predictable outcome in terms of looks of future seedlings.

FYI, it feels more comfortable to talk about "types". There are too many hybrids, varieties and cultivars these days with all those fancy names it's more confusing than helpful. Also, these plants change their appearance (leaf color and shape) a lot depending on the growing conditions, so that what you see on a picture is not necessarily what it will turn into in your home.

This is the first Adromischus I got back in 2013. It is actually bright green but the older leaves that were turned to the sun are now a bit yellow. Green types are less demanding and seem to grow well under my conditions.


Since then I could grow 3 clones from its leaves that already look like adults. They grow on a sunny spot on my windowsill and the leaves are tight to the stem and nicely round. However, I have noticed that the strong sun seems to bleach them out a bit. The green types get pale after a while.


This most recent leaf cutting was standing in half-shade and is much greener.


If you compare it with another clone, it looks like a different variety. One is bright green with pointy leaves (half-shade), another is pale with round leaves (full sun). They are genetically the same. Maybe I should move all of the green types to a less sunny spot. It might give them a greener color. But do I also want to relinquish the round shape of leaves?


There are two more clones grown from a single leaf but the leaf was not very healthy and dried up too soon. They are very small and look like seedlings.


About the fancy named cultivars, I have troubles telling the green ones apart. For example, the below plant is called "Green Monster" but to me it looks exactly like those above. It's nice to have a genetically different greenie though. In fact, I was not going to allow my old greenies to flower this year but if there is a chance of successful pollination I might reconsider.


Another one is called "Lime Drops" which I can accept as different. Lemony color and pink folded leaf tips. By the way, I got this beautifully grown plant along with several others from Kakteen Plapp nursery which I can really recommend. The plants have not lost any leaves during transport! Newspapers are the best packaging material.


However, "Lime Drops" cuttings I got from another seller look just like my old greenies. No complaints here. My collection is so small that I'm glad to get any kind of A. marianiae plants (or leaf cuttings).


This plant was offered on ebay under the name of "Little Spheroid" which was doubtful. I got it anyway because I didn't have this type of texture and color among mine yet. Where is the plant, you ask? Well, due to bad packaging it arrived completely disassembled.


To be continued...

Adromischus marianiae: Part 2 (17 pics)

$
0
0
Over the last weeks I was trying to put together a small collection of Adromischus marianiae plants, to be specific the bumpy warty types. Even though I, of course, can not afford those cool looking hybrids and cultivars, I think I still could get a nice selection of colors and shapes. What I'd really want to do now is practice growing them from own seeds. Creating own hybrids would not be meaningful with the plants I have. Online research shows that the prettiest ex. herrei hybrids are done with a variety called Clanwilliam (probably referring to the habitat location), which are of course also not affordable even in its pure form. So unless someone is willing to send me a leaf of the said Clanwilliam (please?) I'll be trying to get non-hybrid seeds from my plants. Luckily, some are already growing flowers.

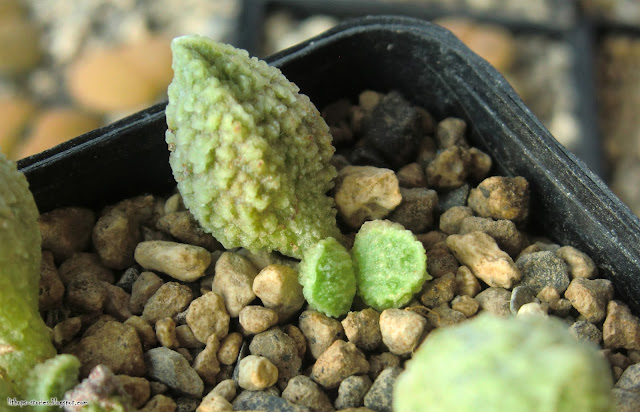
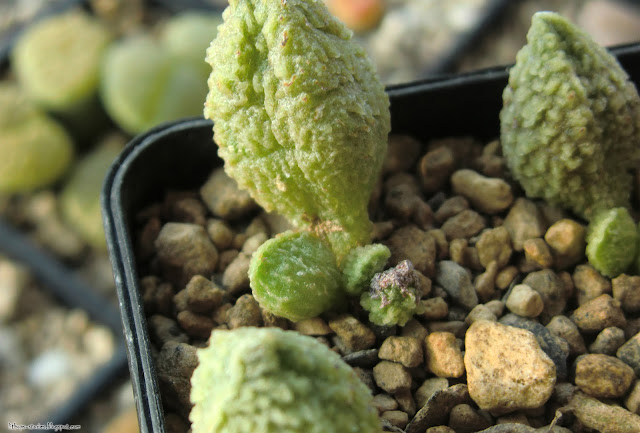
The last post featured green types of Adromischus marianiae so I'll start with the last greenie in the bunch. It's difficult to get the names even approximately right so please bare with me. The label says it is an Adromischus marianae "alveolatus" (Kinderle) (the Adromischus book offers a bunch of synonyms). The leaf texture is more delicate - tiny bumps instead if furrows and dents of the more common herrei varieties. To me, it's like a 'Little Spheroid' cultivar but in light green.


I've seen similar plants with elongated leaves under the same name. And I even got one more from a different source and the shape of its leaves is already different from the one above. Who knows what those names really mean.


And here is Adromischus marianae 'Little Spheroid'for comparison. Except for the color the leaves look similar to the plant on the first photo. This cultivar seems to be a bit touchy and easy to overwater.


I'm currently propagating a whole bunch of little spheroids from leaves as backup copies.


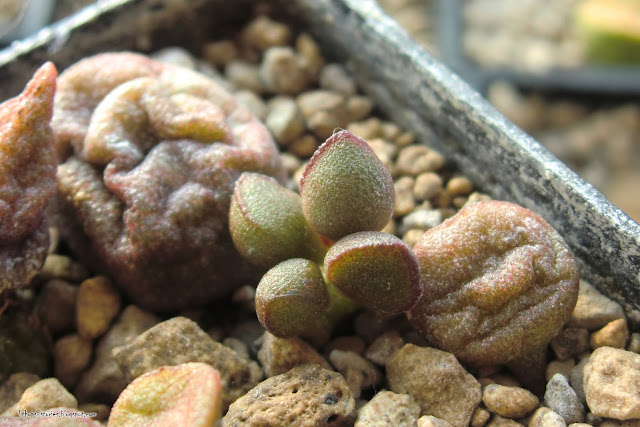
Here are some other Adromischus marianae "alveolatus", the brownish types. Very pretty and rather small. I like them a lot and hope not to kill them.


This one I got with the label Adromischus marianae v. herrei 'Aubergine'. I don't see much difference compared to the alveolatus above, do you?


We're moving further into the bumpier territory. These are Adromischus marianae v. herrei 'Red Licorice' and the new leaves do look like it.


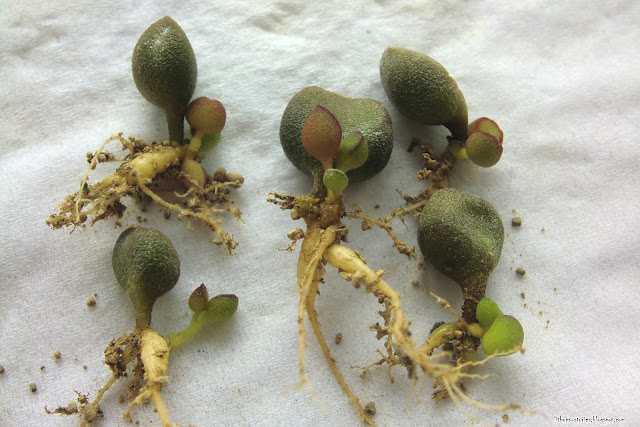
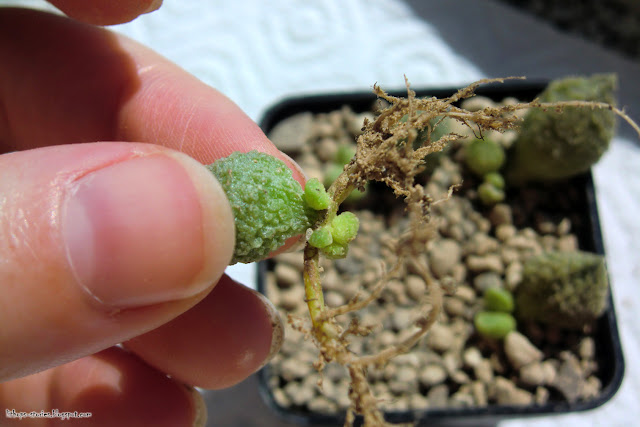
I was surprised to see the roots on this one. They say, sometimes Adro leaf cuttings grow roots but never any new leaves. Seeing this specimen, it kinda feels like you just need to wait long enough. This leaf cutting has developed all this thick root, which might have taken it months and months of work, and only then, from out of the root, a new branch with new leaves has grown. Amazing.


Here is an Adromischus marianae v. herrei 'Coffee Bean'. I can totally see it.


Also very interesting and beautifully colored - Adromischus marianae "antidorcatum".


Adromischus marianae v. herrei 'Red Coral'is a red type of the herrei from my previous post. The sunnier it is the redder it gets.


Here is another one. Very nice texture but we need to work on the color.


And here is the red type plant I've had since several years. I am fascinated every time it changes color. This plant has been enjoying lots of sunlight over the last 4 weeks and just look how it has changed! Here are the before and after pictures of the same plant.


This is all for now on Adromischus. I'm still checking Ebay but not as enthusiastically as before :D

Growing Lithops, year after year (9 pics)

$
0
0
Those of you who have tried growing adult Lithops know that the first year or two are crucial. The plant you bought might have been either too small and too weak, or too big, overfed and stretched or it just might not have liked your environment and died due to acclimation. I've been growing Lithops for over 10 years now, and the good news is - once a plant has survived those first 2 years and found its most efficient size and shape, it will just keep going. 
(You can find my detailed report on appropriate Lithops sizes and shapes - for windowsill conditions and all natural light - here, here and here.)

I have complained before that it was difficult for me to keep L. julii and L. karasmontana alive long. Looking back, it seems this was mostly because they tend to stretch. Getting a stretched Lithops back in shape is rarely successful. Getting a slightly stretched Lithops back in shape is possible but it takes a couple of years. And if it survives the process it'll be fine. In fact, once in shape it stays in shape.

I've had the below L. julii ssp. fulleri v. brunnea (C179) for 10 years now. This small round shape is, in my experience, the most "safe" one. Once my L. julii or L. karasmontana have it, they stay on course. Last year, it skipped regeneration, but regenerated just fine this year.


This is another example. I've had this L. julii since 2013 (bought in a hardware store). According to my photo records, it took the current shape around 2015 and kept it ever since.


The below two nameless L. julii are from the same hardware store bunch. However, after several stretched regenerations, they got into the round shape only this year. I'm hopeful they are now on the safe side. 


This orange L. karasmontana shares the same story. I bought it slightly stretched in 2015 but for the last couple of years, once it settled down, it's been doing great.


This L. karasmontana ssp. karasmontana v. aiaisensis (C224) has been in my care since 2011. Going strong.


Of course it is best to make sure the plant is short and small from the start. Since most of us order plants online from a list these days, without knowing what they look like, it's not that easy.

Here are some plants I could select myself when I bought them back in 2015.

L. julii ssp. fulleri v. brunnea (C179)


L. karasmontana v. lericheana (C330)


Another L. karasmontana v. lericheana, 6 heads, bought last year. Short as the heads are, it should be fine now.


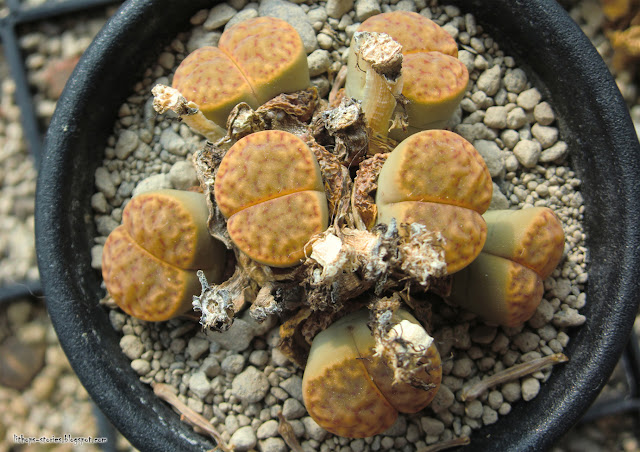
Hand-selecting is not always a guarantee though. I picked these two last year, and this year, one is very late with its leaf change. If it survives it will be late next year as well. I doubt anything good will come out of it.


As always, sorry for all the cat hair in the pictures.

Lithops, my old friends (10 pics)

$
0
0
After yesterday's lithops post I've been feeling nostalgic, browsing through old photos and blog entries. Since I was talking about plants I've had for years I got curious and wanted to see what I wrote about them back then.

It's hard to decide whether it is depressing or uplifting to see those old photos. The plants I got as adults look just as fresh and shiny now as 8 years ago. There is no difference at all. Meanwhile I am getting older and for sure don't look the same. Yearly rejuvenation was a good choice.

Here is a photo of a L. dorotheae (C300) I took this week and here is the entry where I mention this plant for the first time, in 2010, when I was still in Japan.


These two I bought the same year in Japan as well. It is the "de Boer" variety of L. dorotheae with a stronger coloring. It seems back in 2010 these were the first L. dorotheae I grew.


And their own two-year-olds look promising, too.


This slightly unusual L. dorotheae (C300) has grown 2 heads compared to the 2012 photo


L. olivacea v. olivacea (C055). Such a happy plant first mentioned sometime in 2011.


And these guys! They are my absolute favorites! And it has nothing to do with the fact that they are the first Lithops I grew from seed back in 2008. Ok, it's partly the reason :D 
But they have the most perfect color, pattern and shape. Stunning plants. 10 years old now.
L. lesliei ssp. lesliei v. minor (C006)


These L. bromfieldii v. glaudinae (C382) were sown in 2010. I can not believe they made it.


L. lesliei ssp. lesliei v. mariae (C141) from the same year. It took them several years to develop the typical mariae pattern and now here they are.


And of course the L. gracilidelineata from the year 2009. They survived my mother's generous care when I was studying in Japan and they have been flowering, too. 


Lithops make me feel old.

Lithops portraits 2018 (15 pics)

$
0
0
In case you haven't noticed I'm on vacation :)
Which means finally time to take care of my (mostly plant related) hobbies. And I don't have to tell you how much I enjoy the company of my cat. All of it is so relaxing. Playing with Mila, checking on the plants, napping with Mila, taking some plant pictures. It's the paradise on earth. I hurt my back recently (which sucks) but it gives me a legit excuse to just be lazy and enjoy myself.

Now I'm just gonna spam you with some Lithops photos :D

L. ruschiorum. Love their new faces.


L. marmorata. Very slow old leaf digestion.


L. marmorata 'Polepsky Smaragd'. Good shape and color is only possible by very careful watering.


L. localis. These guys start to stretch as soon as I start thinking of watering them. They are tiny but it's the only way to keep them alive.


L. aucampiae are more difficult than you think. I've killed a lot of them so far. This is a really nice specimen though.


L. bromfieldii v. mennellii. Love the texture.


L. lesliei ssp. burchellii (C302). Love the fluid pattern.


L. lesliei ssp. lesliei v. venteri. Nice and flat. Got them as adults in 2011.


L. lesliei ssp. lesliei v. venteri 'Ventergreen' (C001A). These are 7 year old seedlings.


L. lesliei ssp. lesliei v. lesliei 'Albinica' (C036A). Got them in a hardware store in 2012.


L. lesliei ssp. lesliei v. lesliei (grey form) (C008). Got them in 2010.


L. bromfieldii v. insularis (C042). I haven't had a very good experience with multiheaded plants in my environment. But L. bromfieldii are hard to kill so I gave it a try last year. It regenerated fine so it should be okay now.


Adromischus propagation (13 pics)

$
0
0
It's not easy to find information on Adromischus propagation in general. Actually, there is basically no information at all. These days I have been trying to figure it out on my own.

I have to say, propagation by leaf cuttings is rather straightforward. Even a complete newbie like me can successfully get backup copy plants by sticking leaves into pumice. It is recommended to leave the substrate with leaf cuttings dry, however, I do water it a little. It's risky and so far I have lost one healthy leaf to rot but I think roots come out quicker this way. So if you follow my example, do it at your own risk. Roots normally come after a couple of weeks already. For leaves you might have to wait much longer. Once the new leaves come you're on the safe side.

If you want to propagate your plant it is better to take a bigger healthier leaf. I know, you don't want to ruin the looks of the mother plant (those leaves grow very slowly) and would probably take an older uglier leaf from the bottom. That's no problem. Just don't wait too long, not until it gets shriveled and spotty. It still has to be firm, big and fresh and full of water (water the plant several days before snipping off the leaf if necessary) to give the new plant a better start. The new plant will feed of this leaf for up to one year. The bigger that first leaf the quicker the new plant will grow.

So here are some of this year's cuttings.

These are the leaves of an Adromischus marianiae "Little Spheroid"plant that arrived in spare parts in April. After approximately 4 months there are now new leaves showing. But make no mistake, these are only 5 out of the 14 leaves planted. All the rest of them don't show any new growth at all, although they have grown massive root systems.


As you can see, the roots are very well developed and the plant makes sure to grow all this bulk before it starts growing leaves.


Here is a leaf cutting from another "Little Spheroid" plant. The initial leaf was bigger and, even though it was planted later than those kids above, the resulting plant is much stronger and much further along.


Here are the 4 Adromischus marianiae v. herrei "Lime Drops" leaves I planted back in April.


This one seems not to recognize gravity as a growing guide. It's all over the place. Roots grow upwards, leaves grow downwards. I didn't even know how to plant it best. Maybe I should have cut off one of the roots and planted it sideways. 


This Adromischus marianae v. herrei Alveolatus, Kinderle was planted end of May and has just started growing new leaves.


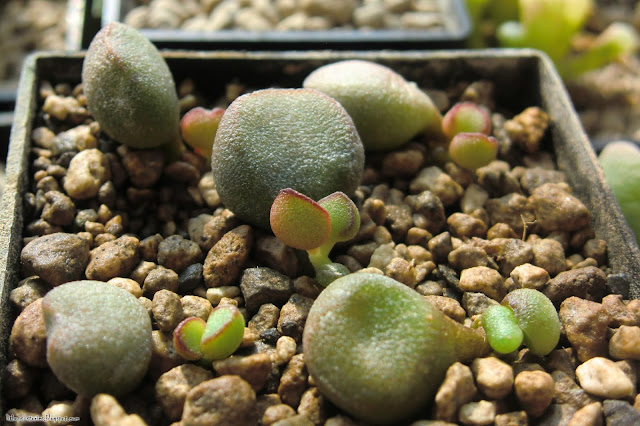
They are all so small at the moment. It's hard to imagine they will look like their mother plants at some point. But the growth spurt will come eventually. Below is a plant I grew from a leaf only last year. After 1,5 years it looks like a perfect adult plant.


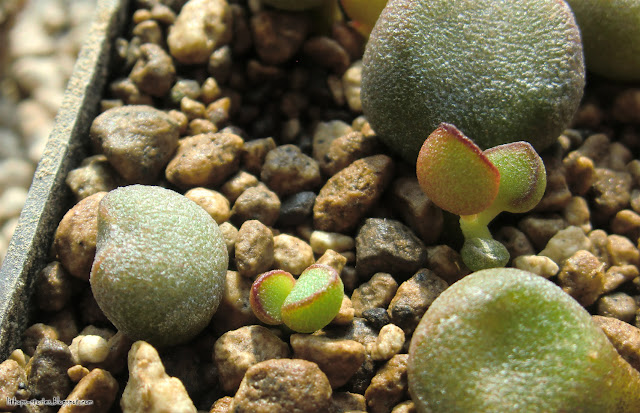
I plan to write about Adromischus propagation by seed soon, too. Or rather the pollination part of it. Growing them from seed is not particularly difficult but you need to be very patient. Below are 15 months old seedlings. They still look like nothing. Cute though.

Avonia flowering (22 pics)

$
0
0
It's that time of the year again! No, not the cherry blossoms time. It's Avonia quinaria time!


But before we get to that, there's more Avonia news I'm probably even more excited about. This year, for the first time, I was able to catch the worm-like Avonias flowering, too. I was convinced they would never open their flowers under my growing conditions, producing seed pods out of flower buds directly. I don't know what happened but this year I could witness the actual flowers. Maybe I was not paying enough attention before (I thought I did!) or maybe this time the heat wave was bringing my windowsill closer to the growing conditions of a greenhouse. Or maybe now that I have more Avonia plants the chances of catching one blooming are higher. Also, while Avonia quinaria open their flowers around 6pm, other Avonias seem to open them around 2pm or 3pm, reducing my chances of seeing them further. Luckily I was on holidays :)

My old Avonia albissima ssp. multiramosa apparently has small, greenish flowers. Good to know. In all those years I'm seeing them for the first time.


This other Avonia albissima has rather large and showy flowers. The fact that the sun is shining on these flowers means they opened before 2pm. 


Avonia grisea (Av133). Very delicate.


Avonia papyracea. The round white petals look like scales. No wonder the flowers are difficult to spot. Especially if they are facing the light source and not the beholder.


Now to the quinarias. Their flowering is always an event! 

The two of the pink-flowering Avonia quinaria ssp. quinaria plants have flowered a while ago, of course not at the same time, that would be too nice of them. And even now I have one pink plant growing flowers. So much for synchronized flowering.


One of them is producing flower with different number of petals within the same flowering season. It's been doing that last year as well. But hey, I've had Avonia quinaria flowers with 4 petals before, too. The regular number is 5. 


I could still get some seeds out of them. While passive self-pollination is very unlikely, I find that brush-assisted self-pollination leads to seed pods more often than you'd think. I even have one seedling to show for it. It's not the only one that germinated but the only one left. I'm not that good at this yet. But seeds produced by selfing are definitely viable.


Speaking of abnormalities. I have this really strong and healthy white-flowering Avonia quinaria ssp. alstonii. It has grown all those branches and I was expecting it to flower nicely. Weeks go by - nothing happens, no buds. You see, normally, the buds would grow from the tips of the branches and then those branches would fall off. Just when I thought there will not be any white flowers this year, the plant started growing buds from its stem! Well, not  from the stem, but from the new and very short branches it grew just so that it can grow flowers. For some reason it wanted to keep all the long branches and that's kinda clever. Why grow long branches for flowers just to drop them off afterwards? That would be wasteful. Better to quickly grow something short instead. Well, it grew 11 flowers in the end and I got my white flowers after all.


And here's another strange thing - one flower opened completely without anthers.


I tried to take some artistic photos, with a proper background. Too bad I didn't have anything black :)


Lithops cultivation on a windowsill (16 pics)

$
0
0
Recently I realized that after almost 10 years of writing about growing lithops and other succulents under less than ideal windowsill conditions I do not have a single post here that would summarize the whole endeavor. Let me try writing it all down now and if I miss something comments are always appreciated :)


Full disclosure. My approach is not scientific, I do not know the pH of the substrate nor do I note the average air temperature throughout the year. The experience I've gathered is based on close observation of the plants and learning from my mistakes. 

1. The windowsill

There are some things you need to know about my windowsill: 

- It is quite spacious, measuring 0.6 x 2.5 meters. Currently I have 4 trays of plants there with several pots standing free. There is room for the 5th tray but I like to have some free space as I do my sowing and repotting (and my cat does her sleeping) there as well. The trays are 40x60cm and contain 77 containers each. I also use the spaces in between trays for shallower pots with younger seedlings and such.
- It has window panes on 3 sides, not just one, thus allows just a little bit more sunlight in during the day. The longest period of full sun exposure is between 6 am and 2 pm in Summer, which is not nearly enough. It's much much less than that in Winter (if the sun comes out at all). There are spots on the windowsill, behind the non-glass parts of the windows, that have more shade. I use those as well, in rotation, for example for sleeping conophytums or rooting adromischus leaves. No free spot stays unused.
- It is directed somewhat South-East, I believe. Meaning, when the sun rises it first appears straight and slightly to the left. Bear with me, I'm really not a scientist.
- I do not use any artificial light. The light the plants get solely depends on the weather.
- I do not use any fans, nor open the windows. The windowsill is in my living room, separated from it by Florentine tulle. Whatever air circulation happens naturally (probably caused by me running around) it seems to be enough.
- I do not manipulate the temperature in any way. In Winter it has about the temperature of my living room (I do not heat during the day when I'm at work). In Summer the temperature rises up to 48°C when the black pots get too hot to be touched. There was never any sunburn related damage on the plants that I can recall, probably because the sun moves on from the windowsill by 2 pm.


As you can see, the above describes the general conditions, constant value, on which I have no influence.

So what are the points that we actually can manipulate? What is it we can do to compensate for all the unforeseen weather-related hardships of our lithops and help them be their best selves?

Here comes the No 1 Rule for growing lithops on a windowsill: Keep your plants as small and flat to the ground as possible. Your goal is - by all means necessary - to prevent them from growing upwards, also known as stretching. The slower they grow and the smaller they stay the healthier and prettier they will be and the longer they will live. All the care you give them should have this as a goal. You can achieve it by controlling what substrate and pots the plants grow in and by restrained watering. 


2. Substrate and containers

The substrate I use is pure pumice or pumice sand. There is absolutely no compost in there nor perlite or aquarium gravel. The size is often referred to as 0-2 mm but what it is is small pumice stones with pumice sand. Both Kakteen-Haage and Cono's Paradise sell it, if you're in Germany/EU, but it is also available on eBay or in stores specialized on bonsai. I tried Akadama, by the way, and it was a bad idea (the stuff they sell here is full of chemicals and slime). Do not use lava stones with holes in them for decoration either or you will never get rid of mealy bugs that hide in there. And if you use decorative quartz as top layer you will not be able to know whether your plant already has been watered recently or not and will keep watering it unnecessarily (believe me I know). In short, it's all pumice, all the way. Below is how slightly moist pumice looks like straight from the bag. I do not wash or microwave it. I only microwave the pumice I use for sowing (650 watts/1 kg/3 min).


You know how lithops like to rot? In pumice it rarely happens. The way it works so well is that the plants don't get "wet feet". Pumice does not retain moisture in a way compost does, making a swamp. Wet pumice, while sucking in water, does not let the roots actually be "in the water". The roots are semi-dry (no swamp) while the plant can still pull the moisture out of the stones when needed. This not only prevents rot but also is a safeguard against overwatering because it dries quicker. One wrong watering (that's often all it takes for your plants to start stretching) in pumice is less likely to be as dramatic as in other substrate. I refresh the substrate every 3 years or so.
It is also important that when you buy a plant that's already in a pot, you immediately pull it out, wash it, let it dry and transplant it into dry pumice where it will stay unwatered for at least a week. Even if you buy a plant from a specialized nursery and think that they use appropriate substrate and want to keep it - don't. What works in a greenhouse will not work on a windowsill. Any trace of plant food or compost will lead to stretching when there's not enough light to support the boost of growth (see No 1 Rule). 

For adult lithops plants I use square plastic containers (with drain holes of course) that measure 5x5x8.5 cm. Anytime I tried something bigger I lost the plants to overwatering. You have no control in bigger pots. 5x5x5 cm pots would work very well, too. Lithops roots go deep though and the depth of 8.5 cm seems to be good for them. Kakteen Haage and Kakteen Schwarz (wholesale) in Germany offer them. The main thing is that the pots are small and you squeeze as many plants (of the same species and age/size) in one pot as possible without them touching each other. One-plant-per-pot approach is for greenhouses.


It is not only space-saving but also another overwatering safeguard. What one sleepy lithops cannot drink up, its neighbor will; what one greedy lithops could have consumed all by itself, it now has to share with others - no rotting roots and no stretching. Normally I have 4 one-headed plants in one pot or 2 two-headed. Below are 4 two-headed plants happily living in a 5cm pot. I can squeeze up to 16 seedlings into those 5 square centimeters - it only does them good.
Also, use plastic, not clay. It dries quicker, is lighter and transplanting is much easier - just squeeze and pull. Thank me later.


3. Watering

This is the most tricky part. And the most important. You will have to summon all your power of observation and self-control to figure it out. Here are some pointers.

The first thing to remember is that, once a year lithops need to change their leaves. The regeneration is a long process that takes several months to complete and in which old pair of leaves completely dries up while the new pair feeds of them, recycling all the moisture. Unfortunately lithops are opportunistic and don't know what's good for them. If water keeps coming old leaves will never dry up and then stacking begins. At the end the new leaves choke on the old ones and the plant stretches, rots and dies. So much for the background.
Our task is now to support the regeneration. In northern hemisphere it means to stop watering completely mid- or late October. The last splash of water comes with a wilting flower. Once you stop watering the roots will become inactive and the old lithops leaves will get wrinklier and wrinklier. This is exactly what we want to see. Winter is a period of active growth, in fact - underneath, deep inside the plant, the new leaves are growing. The wrinklier the old leaves, the bigger the new ones. Around April the old leaves will be gone and the new fresh leaves will emerge. It can be earlier, it can be a bit later. This indicates that you can start watering again. If the old leaves are digested earlier it's better not to start watering until the weather stabilizes (many consequent sunny days). If the old leaves are not fully digested until June, cut off what's left of them and pretend they are. The roots will quickly re-grow and the plant will react to water after the second watering at the latest.


The second thing to remember is that between April and October you can not water by schedule. There is no schedule like "water all your lithops every two weeks". Now your power of observation comes into play. You looks at every each of them, one by one, and decide which one gets watered and which one doesn't. Just looking is not enough, you also have to touch them. If they are wrinkly and soft (sometimes even hiding in the stones) - you may water. Otherwise you may not. When in doubt - don't water, re-evaluate in a week. Sometime during a Summer heatwave you might notice that the plants are wrinkly but hard as a stone. They are resting and no water is needed then. This is supposed to encourage flowering but who knows. Flowers on the windowsill are an exception, not a rule.

How much water do I give them? To illustrate, this is the watering can I use. For watering of one pot, no matter how many plants are in it, I use half of it.


I do not fertilize. Because I always forget. When I do remember, I do it in August or September. The beginning of the year feels too risky (stretching).

4. Sowing and seedlings

You guessed it, I use the same place and the same substrate for sowing. All my plants live together on the windowsill, including newly hatched seedlings. The difference is that I microwave the pumice before sowing and use 4x4x4 cm small pots (mainly because 20 of them neatly fit into my mini hatchery, formerly known as "jewelry box"). Bigger Ferrero Rocher boxes work well for sowing, too.


The method is simple: label the pots, fill them with pumice, make it wet, spread seeds on top, cover with a transparent lid and wait. No artificial light needed. You should sow either in February or in September though, when it's colder. In my experience germination starts one week later. Sometimes I get new seedlings after one month. Don't get discouraged. The "3 days" info you find online is fairly unrealistic. For the first few months the pumice surface should stay moist at all times. It does not mean you need to spray every hour. It stays moist automatically because the lid is on. Keep the seedlings under the lid until you feel they are strong enough to move out or be transplanted. Wait until the first true leaves to be on the safe side (about 4 months).


You will see a significant change in their surface structure after the first leaf change. It will be much firmer and stronger, it might already have some color that will keep them safe from strong sunlight.  It's safe to remove the lid and let the pumice surface dry between waterings now. From there the care is basically: when you see them shrivel a bit, give them water, all through the year, even in winter. They are not on the yearly leaf changing schedule yet and will regenerate whenever they like, several times a year. It's how they grow.

This is how they will look like after 2 years. Yes, if they are at this size (4 mm?) you're doing it right. After two years they should be close to the yearly lithops life cycle and at the age of 4 they should start looking like adult plants. Do not believe the info online that they will flower when they are 3 years old. Can you imagine these tiny kids flowering? In a year they won't be much bigger.


Be patient. This year the seedlings I grew from seed 10 years ago are flowering for the very first time. And oh how rewarding this is!


Adromischus marianiae cultivation tips (23 pics)

$
0
0
I have been growing several Adromischus plants since 2014 but this is the first year I can watch many different types grow and develop. It's exciting and full of discoveries. Having watched them grow for a year or so does not make me an expert but the more I see the better I understand their yearly growing pattern and their needs.


The good news is they are doing very well on a windowsill and in pure pumice substrate! They are definitely not the genus that is "best in a greenhouse", in fact they don't even need that much sunlight. Half a day of it (the sun moves on after 2 pm here) and careful watering will produce compact and healthy plants.

While the red types develop a nice tan with intense sunlight, green types tend to get "bleached", turn lighter green or yellow. Here is my oldest plant. This year it started developing a second branch from below and is overall a nice and healthy one. The next two pictures are of this same plant, taken from two opposite sides. Can you tell which side is the sun-facing side? :D


When the sunlight get less intense the darker green color returns for those types that were supposed to be dark green like the below specimen.


The babies I grew from leaves in the recent years get greener during winter months, too.


But it also means that the "Lime Drops" variety that is actually supposed to be lighter green with pink tips is now also completely green.


And the "herrei" red types turn brownish green, too. The red color will return in the spring.


The new leaves are more intensely colored anyway. The below younger "alveolatus" variety plants have been growing some new red leaves this Fall. So pretty!


Adromischus marianiae "Little Spheroid" are really prone to stretching. I have a plant that stretches  in winter every year without fail. And then gets back to looking great by the end of summer.


What I wanted to say is that shape improves with time. No need to fret about it. See the below plant? All the new leaves are narrow and pointy. As the year progresses they will get thick and round thus hiding the stems even better and contributing to the tight shape the plant is supposed to have.


Or, another example. I got these "Droedap" locality plants earlier this year with only two big leaves of an undefinable shape on each. But once they started growing all those perfectly shaped and beautifully colored leaves came out.


The coloring and pattern like the number of dots and spots varies as well. The below Adromischus trigynus barely has any dots on the new leaves. The typical pattern only develops with time as the leaves grow bigger.


There have been lots and lots of flowers, on the new plants as well as plants I've had for years (my pollination attempts have failed though). Most of the leaf cuttings have developed into proper little plants within a year and growing them from seed has turned out to be absolutely possible (although very slow). The only thing that is still standing between you and a windowsill full of Adros is their retail prices. Unfortunately the hype is not yet over. But at least if you have one plant, as it grows, you can create "backup copies" and won't need to spend money again if one of them withers. That's what I've been doing. Because boy I won't be able to re-purchase any of them.

Here are some plants I grew from leaf cuttings this year.


And here are the babies grown from seed that are now 1,5 years old. While it was fun to watch the seedlings grow if you're not as patient, growing Adros from leaf cuttings is the way for you.


I have already written about Adromischus propagation and other observations earlier this year. What I would like to address now is the yearly life cycle of these plants and how to water them.

Watering is actually quite easy. All you need to do is touch and squeeze the leaves a little. If they are soft, you may water. I have actually measured my watering can - one watering is ca. 15 ml tops, 10 ml to be on the safe side. You will notice that the leaves will be really firm the next day. From there you just leave it and water only when the leaves are getting soft again.

There are no periods of time with strict drought as with lithops. A little water all throughout the year is fine if you follow the above rule. The plants mostly rest in winter, not wasting the resources, so automatically you will water less frequently. And even if they continue growing during the winter months it's better to slow them down as much as possible since the lack of sunlight will otherwise cause etiolation. We don't want that. The growing of new leaves happens in spring and in the fall. And they will spend all summer growing inflorescences and flowering. I thought at first that if I don't allow them to flower they would grow more leaves but I now believe they would just sleep instead. So, summer is either for flowering or for resting. Note that the younger leaves increase in size over the course of several months, so if I say they would be resting it means they just won't be pushing new leaves. Existing leaves however will (ideally) continue growing in size to create the typical tight cluster.

Tight growth with hidden stems is also the shape to be maintained and supported. For example, as recent as last month my Adros were actively growing and some still seem to want to continue. However, the days got shorter and I already notice that some try to outgrow the tight shape. Time to reduce or stop watering to avoid stretching. Those succulent leaves have lots of resources to support themselves. And while the new leaves get thicker and rounder the overall "dense foliage" will be maintained.

What I wrote so far sounds quite easy but there are also some issues Adros might have. Like any succulent plants they do rot. The roots are very thick, caudex-like even, and the substrate should be appropriate. I use pure pumice. If you use something else at least in the upper half of the pot it should be just as airy. There is another thing I have seen a couple of times - some sort of white mold at the base of the leaves. No idea what the exact cause is (too damp would be my guess) but if you catch it early and remove the mold and the affected leaves the plant will be fine if kept dry for some time after.                                                                                                                                                                                                                      
There are so many different types and varieties of Adromischus marianiae out there that I am completely lost. I have no idea what exterior belongs to which name or locality. At this point I'm just trying to have plants of different shapes on my windowsill and I start to think assigning them numbers would make more sense. If you know how to keep them apart or where I can get reliable data on looks vs. name, I'd really appreciate your help.

Here are some plants whose proper names I can only guess about.


The gift that keeps on giving: A Haworthia story (23 pics)

$
0
0
Winter is over! Warm and sunny days are coming and I can't wait to watch the plants grow. The weather is still being funky - we've had snow and -2°C on Sunday and +15°C with some sun/rain combination yesterday - but most of the lithops are watered and conophytums are sleeping and things on the windowsill are starting to change for the better. Well, except for the mealy bugs. Still need to deal with those...

I've been thinking what story to tell you and decided that something positive and uplifting would be best for the start of the season. I need some cheering up myself and this is what makes me smile these days. If you follow me on Twitter, you might know this story already. It's fun to tell it in detail though :)

Last year, when I was seriously getting into Adromischus, I also started growing more of the Haworthias. These plants can get rather large so I can't grow many. After browsing through those beautiful pictures online, how can you resist? Several plants have found their way to my home. Amongst them, a Haworthia splendens, you know, the fancy Japanese kind, with fat chocolaty leaves and everything. I was quite proud to call it my own but even before I could brag about it it just rotted away in what feels like a day. It turned into a nasty stinking mush without so much as a warning. Tough luck.


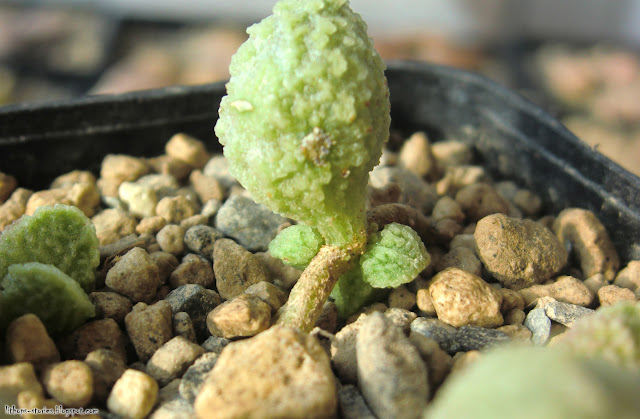
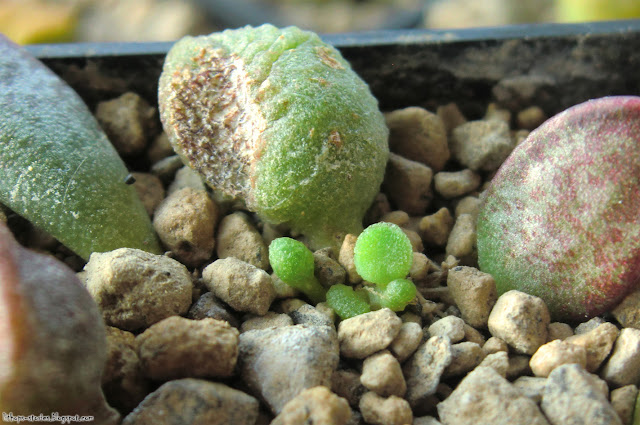
I was still hoping to save some of it so I kept pulling of leaves and cutting it to get to the healthy tissue until all what was left were two small half-leaves. I stuck them into pumice and left them alone. This was last May. 


A couple of months passed and contrary to expectations the leaves neither rotted nor dried up. They just shriveled a little and looked like this in August. 


And then, in September, things started happening! Those are new roots. How exciting is that?


And it gets better! Although it still takes several more months until then.

Last November the leaves finally started pushing new growth. 


And check out those roots!


By January I could already separate one of the baby-plants from the mother-leaf.


(This one kinda grows from the backside of the leaf because why not?)


In March, with a bit of sunlight, the chocolaty color started coming out, too. Along with the leaf pattern and texture.


Every little plant comes with its own fully developed root.


And the thing is, after I started separating bigger plant-babies, the leaves kept growing new ones. I already have five of them and they just keep coming!  I'm very excited to watch them grow and will let you know the final count :D


Here come caudiciforms! (26 pics)

$
0
0
If you happen to follow me on Twitter you're already aware of and hopefully not too annoyed by my current obsession with caudiciforms. Same as with Adromischus last year and Anacampseros/Avonia the year before that, my interests shift and develop and inevitably include a new genus or type of plant to obsess about each year. It does not mean I'm neglecting any of my earlier passions. Those passions are very much alive and growing. But discovering new plants for oneself, as you surely know, is a special delight. From what I see within our plant growing community, my fascination with caudiciforms of all kinds was long time coming and could even be considered a natural progression of sorts. And yes, it probably means Haworthias are next! 😄

Before going on a shopping spree I did consider accommodations for the new plants. A corner in front of the balcony was not being used sufficiently, even though it is a really bright spot with lots of morning sunlight and ceiling-high windowpanes for vines to enjoy. I have also cleaned milk glass films from two panes to enable plants be placed floor level. And yet, it seems I have underestimated how large the leaves and vines can get! Luckily not all of the fat plants grow at the same time. I still have some wish plants in mind that I would like to get, but the collecting is practically over and the growing begins. The exciting part!
Here is the general setup, with some other plants strategically placed on windowsills.

You see those ginormous vines and heart shaped leaves? That's a Stephania (most likely rotundifolia or cephalantha). Got this one at the Essen succulent market some time ago after another Stephania species (the one with round leaves, S. erecta I believe) was snatched away from under my nose (this year's market was brutal!). The second choice has quickly become the main attraction. 

So much green and it's growing visibly every day. I swear I saw it move in front of my eyes one morning! I'm not used to this speed of growth with all those mesembs and co. She needs a lot of water to support all this, too. But these leaves are worth every effort.


Next are the two Cucurbitaceae (pumpkins) I got from the same place. Both for some reason have abandoned all vines except one, which then proceeded to grow until it reached the ceiling. They are still trying to continue growing, somewhere, somehow.
The leaves are very similar. Left is Cyclantheropsis parviflora, right - Momordica boivinii.


The caudex shape is quite different though. Momordica boivinii is still rather young but from what I understand the caudex will be something of a tree trunk.

It has been flowering, too, showing male as well as female flowers. The timing was not right for any pollination attempts.

Cyclantheropsis parviflora's caudex is flat with really nice bark. Honestly, bark of caudiciforms is so fascinating. Especially the way it splits and peels and then splits again when the caudex grows.


The whole thing with bark cracking when growing is of course most prominent in certain Dioscorea species. I have a couple of young Dioscorea elephantipes, while I'm not 100% sure the bigger plant is D. elephantipes. The smaller plant is just waking up.

The bigger one is actively growing and showing great climbing skills, too. Clever plant does not inflate its leaves until it gets a good grip somewhere. 


By the way, if you thought these are ball shaped underneath, the shape is more of a jelly fish.

I do have a big 30 cm Dioscorea, but it's a Dioscorea macrostachya (syn. mexicana) and being a summer grower it's dormant now. Hope it will wake up in March or so... It is alive and rooted. Fingers crossed.

That's no moon! It's a..... Raphionacme burkei

Very cool plant. Hope not to kill it.


It seems to be growing flowers at the moment, followed by leaves. It is supposed to be a shrub which is good because the Stephania is gonna take over the whole climbing trellis anyway.

If you thought this one is round underneath - nope! It's a turnip.


This is a Pachypodium bispinosum that I have to hide from the cat (not that she has ever shown any interest in chewing on plants). It's lodging with Haworthias and is growing well after some initial acclimation problems. I believe these can grow long branches but the previous grower has been carefully trimming them, it seems. I'll try to do the same.

Love the bark/leaf color contrast.

And no, it's not ball shaped. I don't even know what this is. A monster carrot?

What's really ball or coconut shaped is Ipomoea holubii (or Turbina holubii or Ipomoea bolusiana). I could not find any confirmation online that it is toxic, except one mention that the seeds are. Let me know it you know more. The cat does not show any interest in it but still.


What to do with those Haworthia offsets? (19 pics)

$
0
0
When I said "Haworthias are next" in my last entry, I meant it literally 😄

I've grown several Haworthias before but wanted to expand the "collection" a bit these couple of years to have a more or less diverse selection of plants. The problem is I like them all! The big, the small, the fat, the delicate, the little offset-babies, the massive round stand-alone rosettes and the "hens with chicks" - all kinds and in all growth stages. I wouldn't have the room for all of them because they are not only generally bigger then the plants I usually grow. Turns out they also grow much quicker than expected. The majority of plants I bought were very young or sometimes damaged but they quickly outgrew the awkward age and damaged leaves. Others just kept on growing and developing offsets along the way which, of course, I simply have to keep and see what they'll turn into. Luckily they don't require sunlight to be very intense and grow happily on my bedroom's windowsill.

As the plants grew bigger I was presented with a dilemma. What is prettier - a single rosette or a bucket full of Haworthia heads? You gotta decide early on and it all comes down to the question of leaving versus removing the offsets.

With some I was sure from the start what I wanted the plant to be. It was clear that the final destination of the fast growing Haworthia attenuata was going to be a big bowl. And now it's in a 25 cm container with some more room left to freely spread.


With others I was pretty sure they're better off alone.

Like this Haworthialimifolia. With this type of leaves how would an offset sufficiently spread?


Or this Haworthia pygmaea. It's way too pretty in its symmetry.


While it was not that hard to remove the H. limifolia offsets (I've given away so many over the years), I didn't have to face this situation with the H. pygmaea so far.

This year it decided to multiply. And the offset isn't even growing from underneath. Instead it's pushing new leaves from the middle. I won't be able to remove it safely so.. bye bye nice round rosette shape. I'm sure it will grow into something beautiful eventually but it will never be the same.


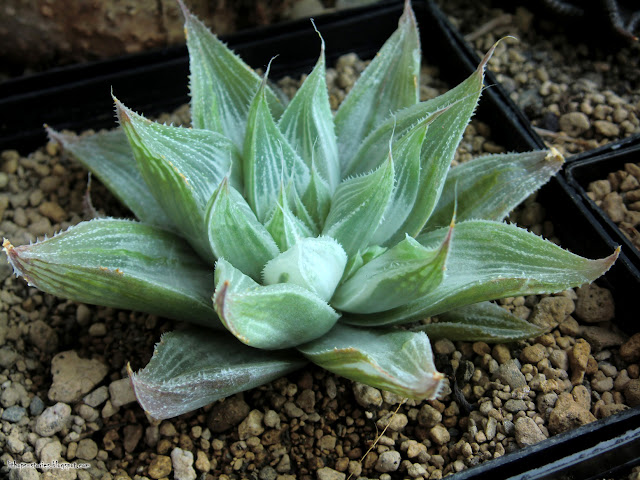
Same story with this Haworthia magnifica var. acuminata 'Grey Ghost'. So far, I have removed 6 offsets from it as they were conveniently growing from the bottom. The one that's growing now is more of a second head. I'll have to leave it and see where it goes.


Initially, my plan was to remove all green-ish offsets while keeping any all-white ones on the plant (it had one already but I stupidly removed it and it of course never rooted). The plant had other plans, oh well. I guess I'll lean into it and just let it do whatever it wants going forward.

I did get two very promising "almost" white offsets from it. They rooted and are coming along nicely. They might become more green as they grow though.


With this Haworthia magnifica fa. asperula I 100% support the offset growth. Got the plant cheap at a fair, with all those strange and damaged leaves. With the new perfect plant heads all around it, it will significantly improve.


Here's a good solution! Just grow 2 identical plants and have one as a single rosette and another run rampant.

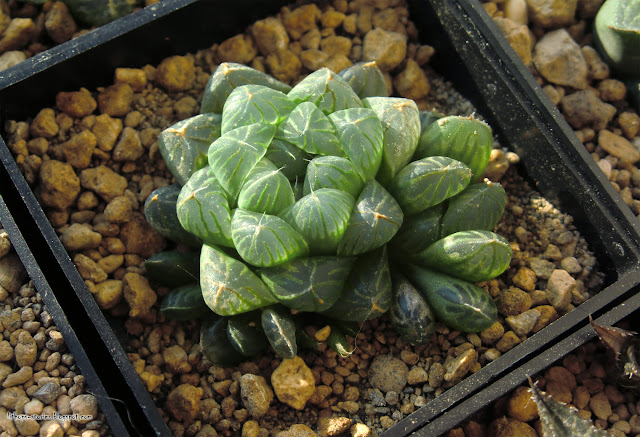
Haworthia cooperi v. truncata


Maybe in the end it's not all that important and it is best to just leave the plant be and let it grow in whichever way it wants. A healthy plant will always be beautiful, no matter its shape and size. I like each and every one of them!


Transplanting Adromischus (7 pics)

$
0
0
The longer I grow Adromischus the more obvious it gets that they really don't like summer heat that much. The intense light isn't beneficial to them either when it's hot. I tend to ignore them in summer because looking at them depresses me. The green types lose their color, the rest is just sitting there deflating miserably while also not taking in water. Then they drop leaves or start rotting. Of course, there are flowers, but they weaken the plants additionally leaving them in a sorry state that mealy bugs like to exploit. And then September comes and the world is new again! They inflate their leaves and new growth appears everywhere, they get plump and happy and I realize I spend most of my time at the windowsill in the Adromischus corner. Fall and spring are the two seasons Adromischus look best!
It's also the time to re-evaluate their growing conditions and transplant those needing transplanting. For example, I had some greenies growing in a shadier place and they made it though the summer retaining their color while the rest all turned yellow. So, now all the greenies have been moved to the shade. It freed up some space for bigger pots, too. Which is convenient as at least two plants have outgrown theirs. 
I couldn't decide first, which one is going to move to a bigger pot this year, my old red-ish type plant or the green one they call A. marianiae 'alviolatus'. After a month of active growth both look great and could spread even more if given the opportunity.


By the way, this is the same plant as on the below picture, taken back in March 2018.


In the end I decided to move the alveolatus and, once the top layer of pumice was removed, it was clearly the right decision. Those roots have no more room in the old pot!


One root massage later the big root beard is revealed.


I wonder if it will fill out this 9 cm pot by next year :)


PS: I've grown several cute babies from its leaves, too.


Adromischus trouble-shooting (23 pics)

$
0
0
In general, Adromischus are not difficult to grow on the windowsill. Good light is beneficial but some types enjoy a shadier spot. I have a big and beautiful Adromischus cristatus growing on my kitchen window without any direct sunlight at all (I'm watering it very rarely as a compensation). Mealy bugs like them but not more than any other succulents. And the propagation by leaf cuttings is very easy.


The one serious problem they have is spontaneous rotting. Sometimes you see it coming but usually you don't. One day the plant looks fine and the next day it's mush with nothing to save.

This one's dead.


I have not yet figured out why this happens and so the only preventive measure I know of is taking leaf cuttings for backup copies in advance, like so.


This year I've encountered a new problem - they're having troubles during summer heatwaves. Normally Adros are flowering during summer months, which weakens them a bit, then comes the heat (and maybe some additional plague like mealy bugs) and they get so stressed they drop leaves. I thought I'd lose several this summer! This drying and dropping off leaves is actually not as bad as it looks. As long as nothing's rotting, it'll be fine. I panicked and removed all remaining healthy leaves for propagation on 4 plants. This may or may not have been a right move but I figured, if the plant is going to dry them off anyway, I'll take them and grow new plants out of them first. This way nothing is lost.

But, I did keep the leafless stems! While the leaves were rooting I put the stems away and forgot about them. Come September, all the bald stems started to push new leaves! They may not grow into well-shaped plants but, with Adromischus, each new fully grown leaf potentially means a new perfectly shaped plant grown from it. Don't throw away those stems!


September


The same plant today


Backed by this experience, I recently tried to "refresh" a couple of older plants. The bushy types of Adromischus that naturally have larger spaces between leaves tend to grow too long with age and then tip over. We don't want that. In the past, on one or two occasions, I removed the lower leaves and buried the plant deeper. This year I simply cut them in two. The top with younger leaves can be rooted again while the bottom regrows. 


Three weeks later


Got some leaf cuttings from it as well. Propagating like a champion.


Here are some other rooted tips, happily growing. But these were removed because I noticed the base of the root had started rotting. If you notice these things early this is how you save the plant.


My advice to you? As soon as a new Adromischus comes into your home, make a backup copy. It not only prevents you from fear of losing a plant, growing Adros from leaf cuttings is lots of fun, too. Just look at these cuties!


Check out my Twitter Account

$
0
0
Hi guys,

You might have noticed that I don't post all that much here. I'll still be posting in the future but in the meanwhile, please feel free to browse my Twitter account (you don't have to be a member).

I post photos and stories on Twitter almost every day and it's a nice community of plant loving people, too. Looking forward to seeing you there!

https://twitter.com/LithopsStories


Viewing all 335 articles
Browse latest View live